Dodging and Burning

How to be an Artful Dodger  (Author: Dr Eric Tatham)

If you want to use a Brush to selectively darken or lighten part of your image you can of course use Photoshop’s built-in Dodge and Burn tools.

The Dodge tool lightens the brushed area and the Burn tool darkens.

Macintosh HD:Users:Eric:Desktop:Screen Shot 2018-11-01 at 09.57.09.png

Macintosh HD:Users:Eric:Desktop:Screen Shot 2018-11-01 at 09.54.19.png

Right-click on the tool icon to select the one you want.

The problem with these tools is that you cannot conveniently modify any changes you have made other than by using Undo in the Edit menu.

But there is a non-destructive way of Dodging and Burning.

Here’s an image of Princes Street in Edinburgh for us to work on.

Macintosh HD:Users:Eric:Desktop:Screen Shot 2018-11-01 at 10.04.44.png

Let’s say, for example, we want to lighten the buildings at the end of the street.

I usually start by making a copy of the layer.

Select the layer and press cmd-J on a Mac (Ctl-J on Windows) to make a copy.

Macintosh HD:Users:Eric:Desktop:Screen Shot 2018-11-01 at 10.11.45.png

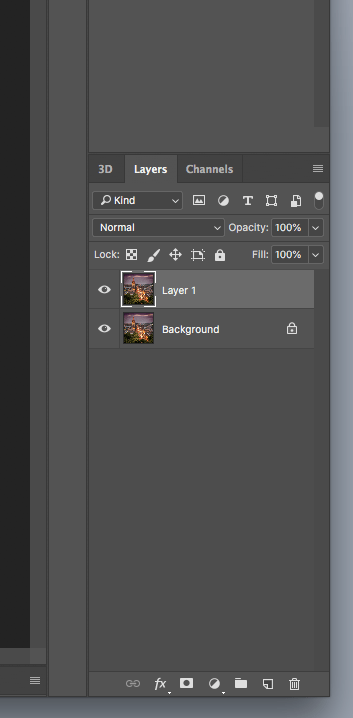
Now we need to make our Dodge and Burn layer.

Hold down the Alt key on a Mac (Option key on Windows) and while it’s held click on the Create a New Layer icon.

A dialogue (ie settings box) will appear.

Macintosh HD:Users:Eric:Desktop:Screen Shot 2018-11-01 at 10.13.26.png

Set the Name to Dodge and Burn, the blending Mode to Overlay and tick the box to set the layer to 50% grey. Click OK.

Macintosh HD:Users:Eric:Desktop:Screen Shot 2018-11-01 at 10.18.24.png

This creates a layer that is 50% grey and Overlay mode means that it blends with the layers below such that any pixels in the image are completely unaffected where the overlay layer is 50% grey.

If the overlay layer pixels are lighter than 50%, the underlying image will be lightened and where the layer pixels are darker than 50% the underlying image will be darkened.

Set the foreground colour to White or Black depending on whether you want to lighten or darken and set the background to the opposite.

You can then easily switch between White and Black by pressing theX on your keyboard.

So, to lighten the buildings, make sure the foreground colour is set to White, select the Brush Tool and adjust its Size and Hardness.

I usually set Hardness to 0% when dodging and burning to give as soft an edge as possible.

Macintosh HD:Users:Eric:Desktop:Screen Shot 2018-11-01 at 10.32.05.png

Initially set the Brush Opacity to a low value according to how much lightening or darkening you want to produce.

Macintosh HD:Users:Eric:Desktop:Screen Shot 2018-11-01 at 10.37.48.png

Then, with the Grey layer selected, paint over the buildings with your White brush.

Use a Black brush to darken again if required.

As well as adjusting the Opacity of the Brush, you may find is easier to control the amount of dodging and burning by adjusting the Brush Flow, especially if you have a pressure-sensitive graphics tablet.

In effect, Opacity limits the amount of ‘paint’ applied and this applies no matter how many times you paint over an area.

On the other hand, with Flow, every time you paint over an area more ‘paint’ is applied and it becomes more and more opaque.

Colour Space

How to avoid a Colour Crisis  (Author: Dr Eric Tatham)

Have you ever taken a photograph and spent time getting the colours just how you wanted (see Fig 1), then seen it projected or on a web page (see Fig 2) and thought “What the ….. has happened to the colours?”

(Fig 1)

(Fig 2)

The problem here is incorrect handling of Colour Space.

The human eye can distinguish a wider range of colours than can be represented by mixing three primary colours; Red, Green and Blue. Hence the International Standard CIE System for representing colour actually uses imaginery RGB values to plot all visible colours on a chart called a Chromaticity Diagram. On this diagram all visible colours fit into a kind of horseshoe shape of colour. (See Fig 3.)

(Fig 3 – Image created by Jeff Schewe)

Unfortunately computer-based images where pixel colours are represented by RGB values cannot actually represent all visible colours.

In figure 3 the triangle labelled ProPhoto RGB contains all the colours that can be represented by mixing, in different proportions, the Red, Green and Blue represented by the triangle corners.

All the colours within the triangle are called the Gamut or colour space of these RGB values. So you can see ProPhoto RGB colour space represents quite a large range of visible colours even including some that can’t actually be distinguished by humans since the gamut extends beyond the visible horseshoe.

All colours within the Adobe RGB colour space are distinguishable To the human eye although the overall gamut is smaller than ProPhoto RGB.

The advantage of using ProPhoto RGB when processing your images is that you are working with the widest possible range of colour. Even though you can’t display them all, the computer can still do its mathematical calculations on this wide range.

The problem with computer displays is that they contain Red, Green and Blue elements that cannot match the Red, Green and Blue of either ProPhoto RGB or Adobe RGB colour spaces.

To ensure industry-wide standardisation all computer RGB display systems are therefore manufactured to the so-called sRGB standard. You will see in fig 3 that the gamut of this is actually quite small with lots of potentially visible colours that cannot be represented.

When processing images it is best to use ProPhoto RGB or Adobe RGB but these must be converted to sRGB for computer display.

The intended colour space for an image is stored in the image file as a Colour Profile. Some display software will read this profile and do its best to convert this to sRGB without too adversely affecting the colour appearance.

So when manipulating your images in Lightroom or Photoshop the images will look close in colour to what you would expect even though they are being converted to sRGB for display.

Unfortunately, not all systems will do this. They will simply take the RGB values in the file and assume they are sRGB hence effectively compressing the colour space. This is what has happened to Fig 2 above.

In Photoshop you can easily check the Colour Profile of an image by clicking on the little arrowhead to the right of the text at the bottom of the image window and selecting Document Profile from the drop-down menu. See Fig 4.

(Fig 4)

You can also assign and convert colour profiles under Photoshop’s Edit menu. Figures 5 and 6 show how to convert to ProPhoto RGB for example.

(Fig 5)

(Fig 6)

Most importantly, whichever Colour Space you are working with, if you don’t want a ‘colour crisis’, make sure you convert your images to sRGB before saving for PDI competitions or for display on a website.