“All the world’s a stage”

img_1015

The house in Stratford-upon-Avon where William Shakespeare was born in 1564.

HDR image with superimposed images from same location over a period of time.

Awarded 1st place in Merit 1 Competition (People) at Dunchurch Photographic Society, November, 2016.

Accepted for MidPhot2017, 54th Annual Exhibition of Midland Photography, March 2017.

Hardwycke Old Hall

img_1027

HDR image to enhance grungy walls.

Voted 3rd Best Picture by the public at Dunchurch Photographic Society Annual Exhibition, Rugby Library, January 2017.

Highly Commended at Dunchurch Photographic Society Merit 2 Competition (Windows), February 2017.

Hit testing in SceneKit

To find a 3D node pointed to by the user in SceneKit, add a tap gesture recogniser in ViewDidLoad()


  let fingerTap = UITapGestureRecognizer(target: self, action: "handleTap:")
  self.view.addGestureRecognizer(fingerTap)


And here’s a simple handler:


func handleTap(sender: UIGestureRecognizer)
{
    let p = sender.locationInView(self.sceneView)

    let hitResults = self.sceneView.hitTest(p, options: nil)

    if let results = hitResults {
        if (results.count > 0) {
            let result: SCNHitTestResult = results[0] as! SCNHitTestResult
             println("Hit \(result)")
        }

     }
}


Using SceneKit with animated Collada file

I recently needed to load a Collada file into SceneKit and have a short animation play once as soon as the file was loaded.

The Collada file with animation had to be exported from Maya and the initial loading and playing was very straightforward.


func sceneSetup() {
    let scene = SCNScene(named: "Scenes.scnassets/test.dae")
    sceneView.scene = scene
    sceneView.autoenablesDefaultLighting = true
}

However, the animation looped continually.

I not sure this is the best fix but iterating through all possible node animations and setting the repeatCount to 1 fixed the problem.


func sceneSetup() {
    let scene = SCNScene(named: "Scenes.scnassets/test.dae")

    //Get all the child nodes
    let children = scene?.rootNode.childNodes
    
    //Initialise the count of child nodes to zero
    var childCount = 0

    //Iterate through the child nodes
    if let theChildren = children {
        for child in theChildren {
            let keys = child.animationKeys() //get all the animation keys

            //Iterate through the keys and get each animation
            if let theKeys = keys {
                for key in theKeys {
                    let animation = child.animationForKey(key as! String)
                    //Set the repeatCount to 1
                    animation.repeatCount = 1

                    //Write the new animation back
                    scene?.rootNode.childNodes[childCount].removeAnimationForKey(key as! String)
                    scene?.rootNode.childNodes[childCount].addAnimation(animation, forKey: key as! String)
                }
            }
            //Increment the childCount
            childCount++
         }
     }
     sceneView.scene = scene
     sceneView.autoenablesDefaultLighting = true
}

Making a Singleton in Swift

A Singleton is a design pattern that only allows the instantiation of a single instance of a class.

Here’s a simple way of setting up a Singleton in Swift.


let sharedThing = MySingleton()

class MySingleton {
    var name = "Eric"
}

This can be accessed anywhere in your code.

sharedThing.name has default initialisation value “Eric” and can be set with a line such as;


    sharedThing.name = "Lynda"

A lot less typing than was needed to do the same thing in Objective C !

UISlider Thumb Tint not working

Seems to be a problem when trying to set a UISlder’s thumb tint in the Attribute Inspector as well as in code. The colour of the thumb stays white whatever colour it is set to. A work-around appears to be to assign an image first. Simple enough to assign it’s existing image and then the tint works when set programmatically.


UISlider.appearance().setThumbImage(self.alphaSlider.currentThumbImage, forState: .Normal)

self.alphaSlider.thumbTintColor = UIColor(red: 1.0, green: 0.0, blue: 0.0, alpha: 1.0)

Strange!

Replacing MKMapView annotation with a popover

When working recently with a MKMapView I wanted to replace the usual annotation view with a popover. First try at this resulted in the popover displaying correctly but together with the annotation view.

I then tried turning off the annotation view using

view.canShowCallout = false

inside the function

func mapView(mapView: MKMapView!, viewForAnnotation annotation: MKAnnotation!) -> MKAnnotationView!

Although at first this seemed to give the desired result, the pin could not be selected a second time. The solution was to first ensure that the annotation had been deselected before presenting the popover.

func mapView(mapView: MKMapView!,didSelectAnnotationView view: MKAnnotationView!){

// deselect the annotation first self.mapView.deselectAnnotation(view.annotation, animated:true)

var popOverContent = UIStoryboard(name:"Main", bundle:nil).instantiateViewControllerWithIdentifier("MapPopOverVC") as UIViewController popOverContent.modalPresentationStyle = UIModalPresentationStyle.Popover popOverContent.popoverPresentationController?.sourceView = view popOverContent.popoverPresentationController?.sourceRect = view.bounds var detailPopover: UIPopoverPresentationController = popOverContent.popoverPresentationController! detailPopover.permittedArrowDirections = UIPopoverArrowDirection.Any presentViewController(popOverContent, animated:true, completion:nil) }

Swapping ViewControllers on device rotation

I recently needed to have one ViewController for portrait orientation and a different ViewController for landscape. To achieve this using iOS 8 and Swift, create the two ViewControllers in your StoryBoard along with their classes. Ctrl-drag form one to the other and vice-versa, creating modal segues between them. Name the Identifiers; in my case these were fromMap and fromNews. Then, in each of the ViewController classes, override willRotateToInterfaceOrientation(…).

 
override func willRotateToInterfaceOrientation(toInterfaceOrientation: UIInterfaceOrientation, duration: NSTimeInterval)
{
        if (UIInterfaceOrientationIsLandscape(toInterfaceOrientation))
        {
                self.performSegueWithIdentifier("fromNews", sender: self)
        }
}
 
override func willRotateToInterfaceOrientation(toInterfaceOrientation: UIInterfaceOrientation, duration: NSTimeInterval)
{
        if (UIInterfaceOrientationIsPortrait(toInterfaceOrientation))
        {
                self.performSegueWithIdentifier("fromMap", sender: self)
        }
}

Knitting Together App

In June 2001 Leicester City Museums Service and its partners successfully gained a grant from the New Opportunities Fund to develop a website celebrating the history of the East Midlands knitting industry. The Knitting Together project commenced in December 2001 digitising objects from museum collections in the region.

This App represents a follow-up to that work with interactive, location-based information about the heritage of the knitting industry to be found in central Leicester.

Knitting Together is also part of the Spinning the Web consortium (Manchester City Council, Blackburn with Darwen Borough Council, Calderdale Metropolitan Borough Council).

knit1       Knit2       knit3

Download free App for iPhone or iPad at Apple’s App Store

Augmented Reality Roman Leicester App

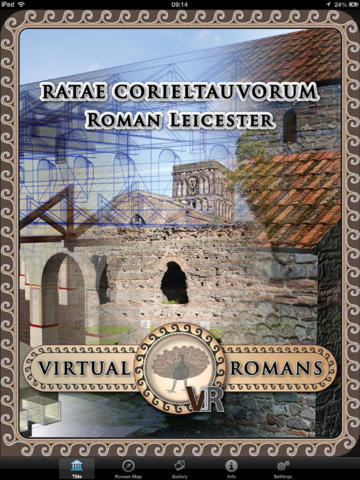
The AR Roman Leicester App is a location-based virtual reconstruction which seeks to bring some aspects of Roman Leicester (Ratae Corieltauvorum) in the year 210 AD to life through 3D graphics and augmented reality.

It has been developed by De Montfort University in association with Mixed Reality Ltd and with support from Leicester Arts and Museum Service and the University of Leicester Archaeological Services.

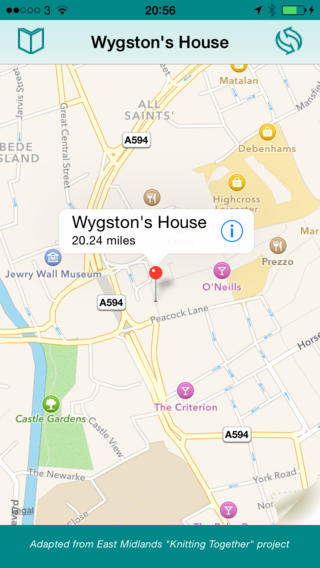
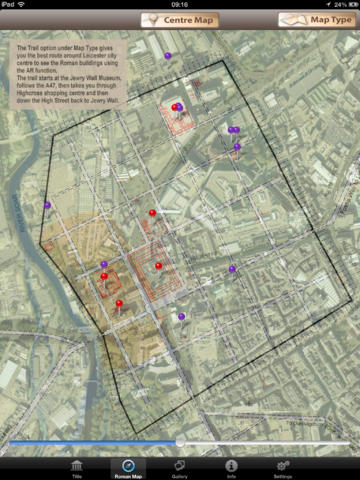
You can view a selection of 3D Roman buildings and artefacts using either the map or gallery page.

Having selected a building or artefact, you can learn more about it, see a Roman ‘brooch’ acting as a compass pointing towards the original ‘find’ location, and view an interactive 3D model.

If you are close enough to the real location, an Augmented Reality view is activated that allows you to see the building or artefact overlaid visually on a camera view of the real world.

Even if you are not near the site in Leicester you can use the Settings tab to select Advanced Settings then move the pointer to wherever you wish to be on the site map.

VRomans3 VRomans4vRomans1     VRomans2

Featured on BBC East Midlands

Error
This video doesn’t exist

Download free iPad App from Apple’s App Store